The folks at Kerberos Productions know plenty about 3D printing gaming miniatures. They predict that the future of tabletop gaming will see very many gamers producing their own models at home. In fact, their latest Kickstarter THE PIT: Board Game includes 3D files that allow players do exactly that.
But how easy is to get started? Can you just buy a 3D printer off Amazon, feed it some plastic, some free mini designs and sit back while your army grows? Kerberos kindly agreed to answer some of our newbie 3D printing questions. But first, let’s see how and where player produced miniatures feature in THE PIT
https://www.kickstarter.com/projects/kerberosproductions/the-pit-the-board-game/
[Back this Campaign]
So how did you guys get started 3D Printing?
JOHN YAKIMOW: My first real foray into high-quality 3D printing came on a whim. I had created a digitally sculpted 3D figure as a birthday present for my brother, and I decided to see if I could get it 3D printed somewhere. I googled for the closest 3D printing place to our office in downtown Vancouver, and found 3DSMITH. I contacted them, sent out the 3D file I’d created, then settled back to wait for the results.
A few days later, they called me in and showed me the print. There was my 3D digital sculpt, the detail spectacularly recreated in miniature plastic resin. Well pleased with the results, I took it back to the office to show to the rest of the team. Our lead designer Martin Cirulis, who at the time was putting together the concept for THE PIT: The Board Game, took one quick look and then asked: “Hey, could you sculpt up the Marine from THE PIT and get him printed too?”
One figure at a time, I brought sculpt after sculpt to 3DSMITH, until we had prototyped and printed all our player characters, the Marine, Scout, Medic, and Engineer, and several monster figures, including the Elite Zuul and Zuul Lord monster figures that represent the game’s final challenge.
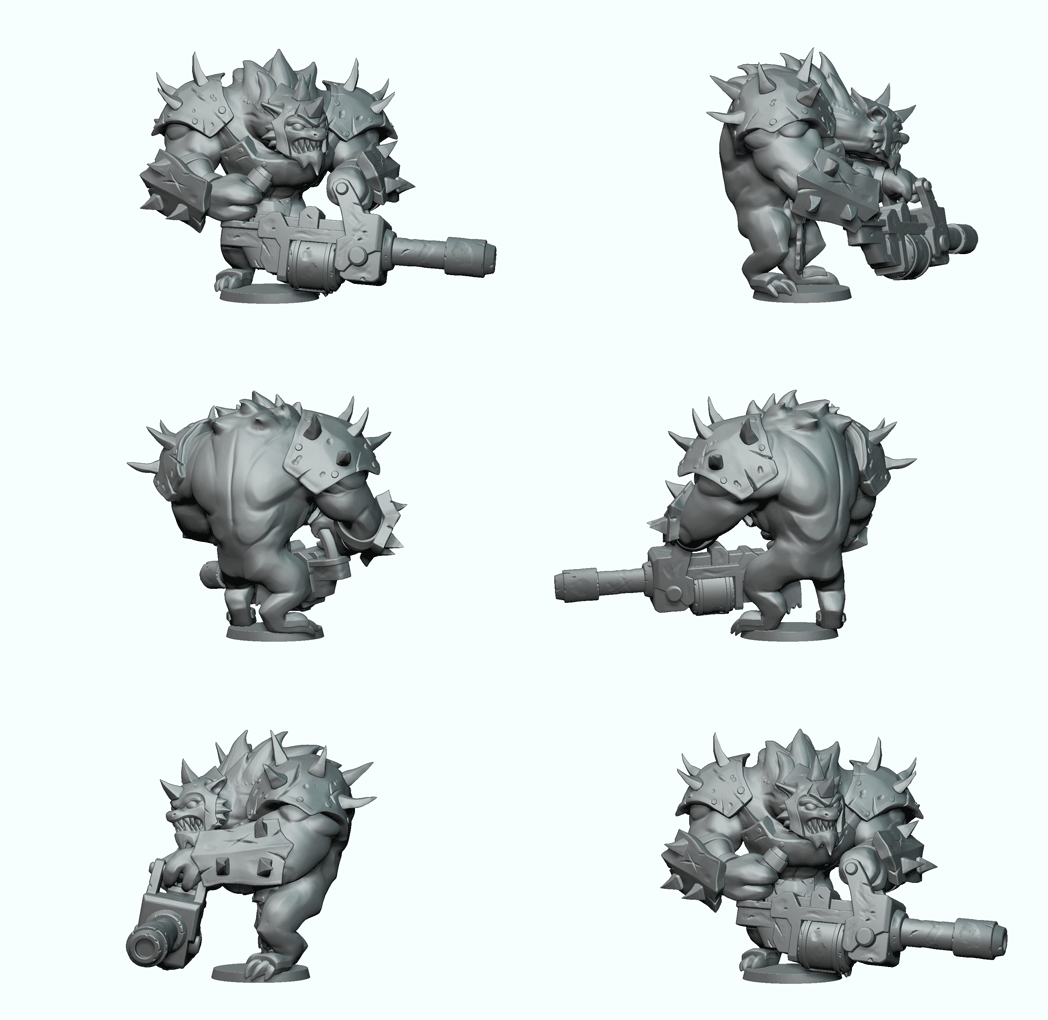
MARTIN E. CIRULIS: A couple of things were obvious right away. One was the potential of the tech: once I saw John’s first mini, I knew that our new board game had the potential to produce some amazing figs!
It was also clear that we needed our own machine. With over 40 unique figures to prototype, some that might require multiple iterations to look and feel just right, getting our own 3-D printer was the most cost-effective answer.
What’s a good price to pay for a 3D printer when you’re just getting started and many looking at printing gaming models?
MEC: We did a lot of research and found that the Formlabs Form2 was going to be the right answer for us. Within a few weeks we were all set up and printing many prototypes a week. We recognized the incredible power of 3-D printing for creating small runs of promotional items, and of course we were also experimenting in our spare time with figs and props from the games we enjoy by other companies.
JY: A good quality filament printer can be acquired for $1200-1500 dollars, with cheaper printers being as low as $200. Quality varies between types of printers – we’d tested some of our files on older filament printers as well, and it came out pretty good, though the fine detail is not as clear as the Form2’s results.
The Form2 is not exactly cheap at $3500 US. But you definitely get what you pay for, when it comes to prototyping and producing high-quality prints with clear fine details. 3D printing is getting cheaper and more accessible all the time, though.
Even if you can’t afford the highest-end printer for yourself, you almost certainly live within a mile of someone who runs a 3D print business. That’s how we got started with 3DSMITH before we took the step of getting a Form2 for ourselves. It’s basically the equivalent of going to Kinko’s versus printing your document at home.
Are some types of 3D printers better for gaming miniatures than others?
JY: Our miniatures nowadays are all prototyped using a Form2, and the quality is outstanding, definitely at tabletop quality. Every time we put a new print in, there’s some fine detail or feature that I’m sure won’t work out and will have to be redesigned or removed, but I’m consistently surprised with what this printer can pull off.
If you’re designing a sculpt for gaming, there are of course things you have to keep in mind. Exaggerated detail on the sculpt will translate to clearer detail on the mini, which is especially important if you plan to paint. You also need to remember that gaming miniatures are going to be picked up and moved a lot, and very small or fine detail can be too fragile to be handled, so exaggerating those as well will give you a more durable piece.
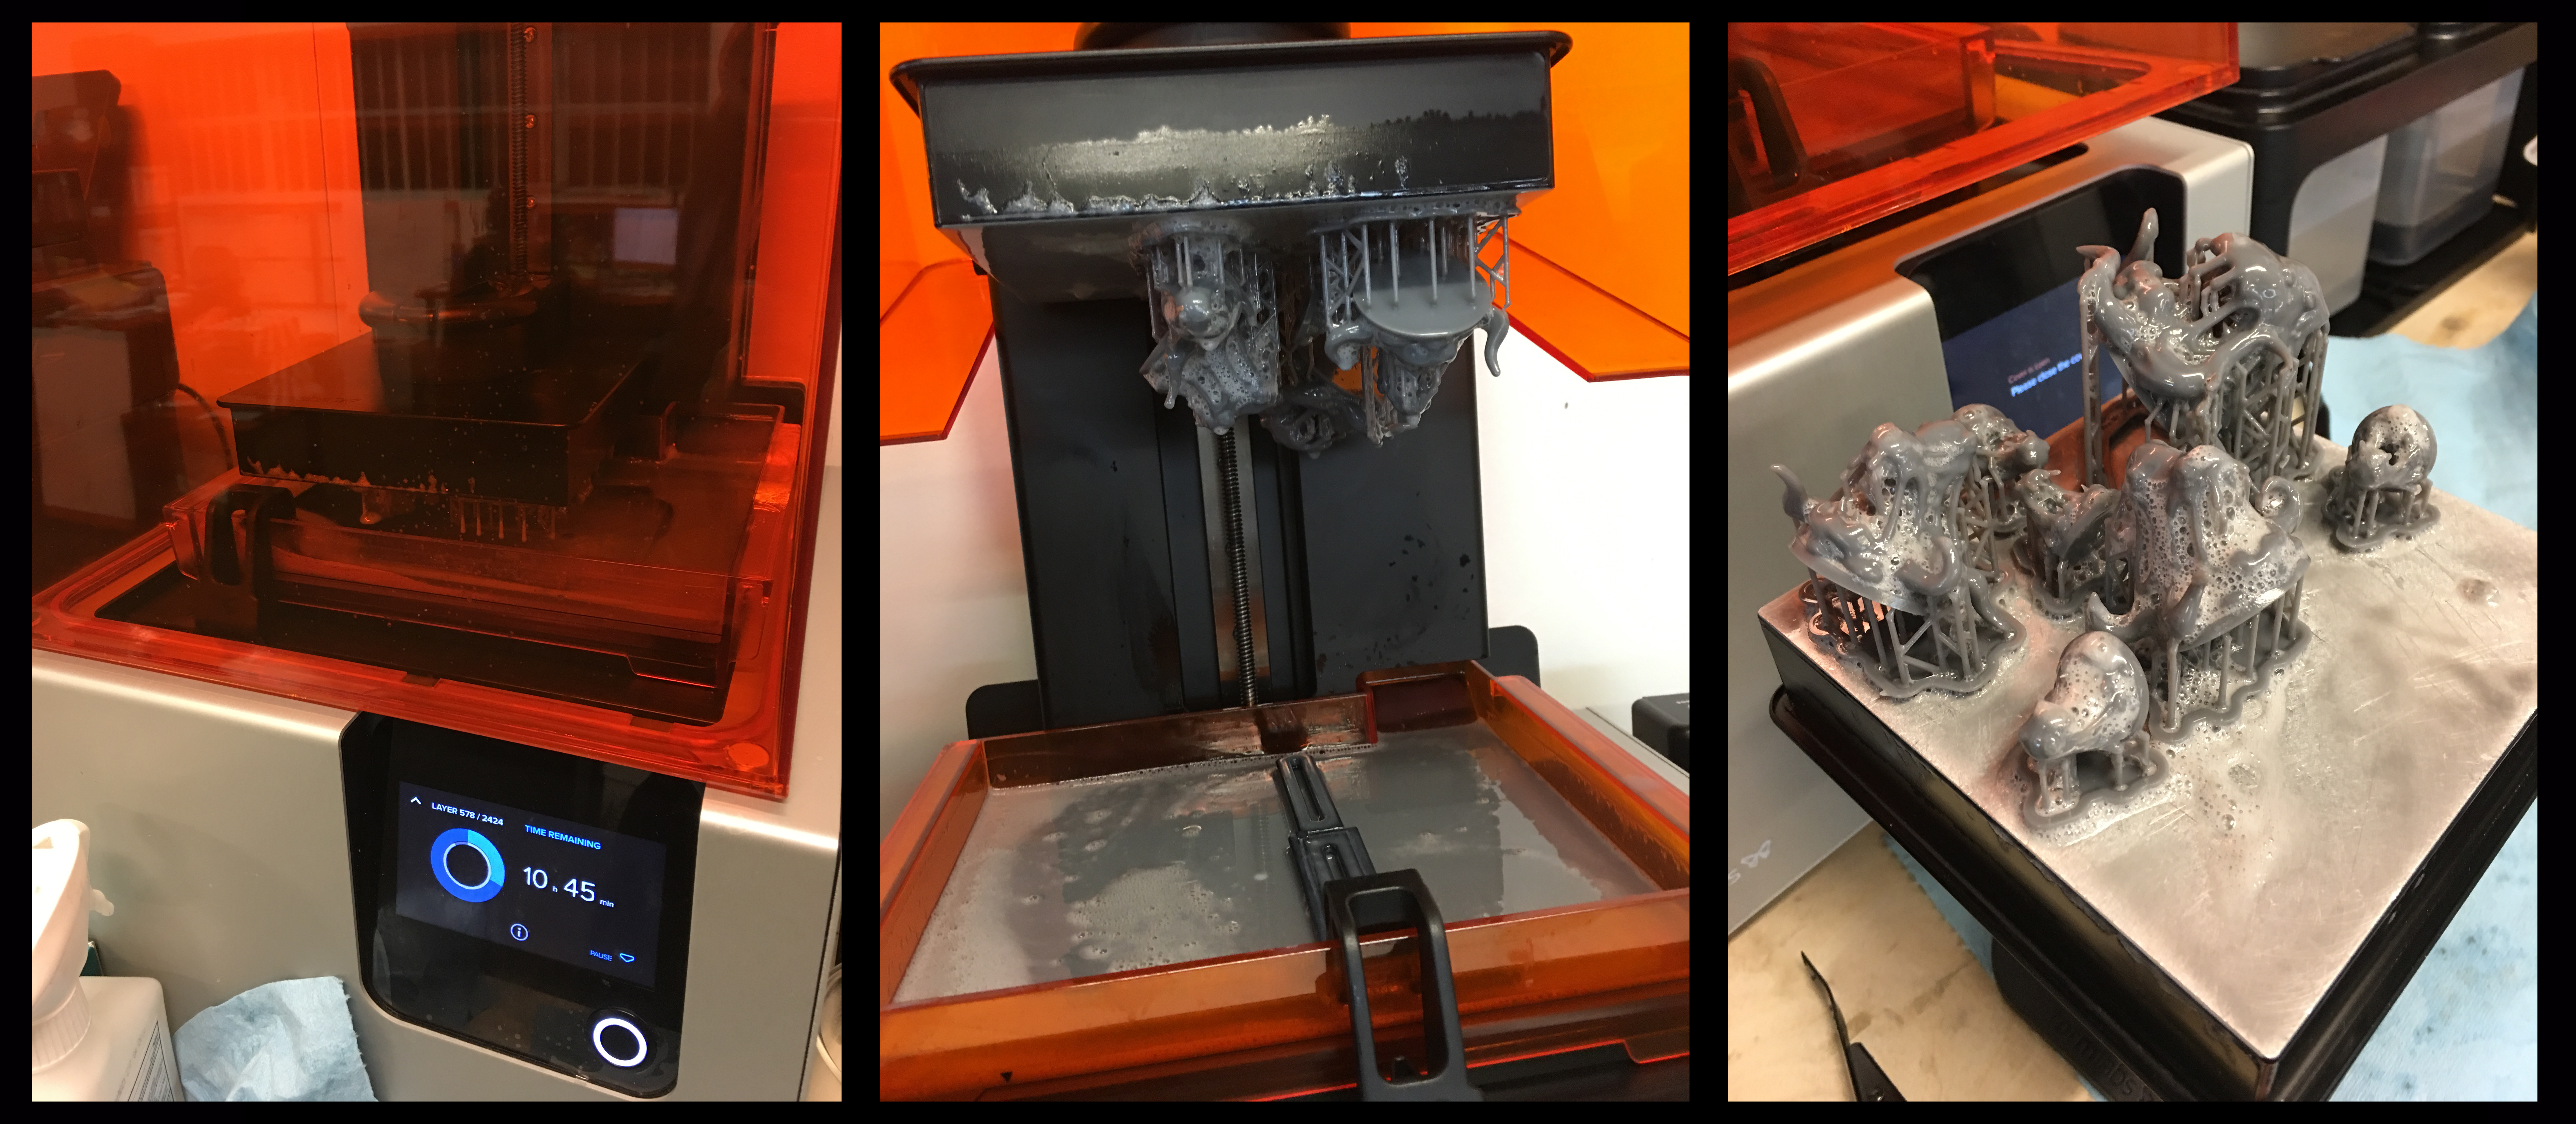
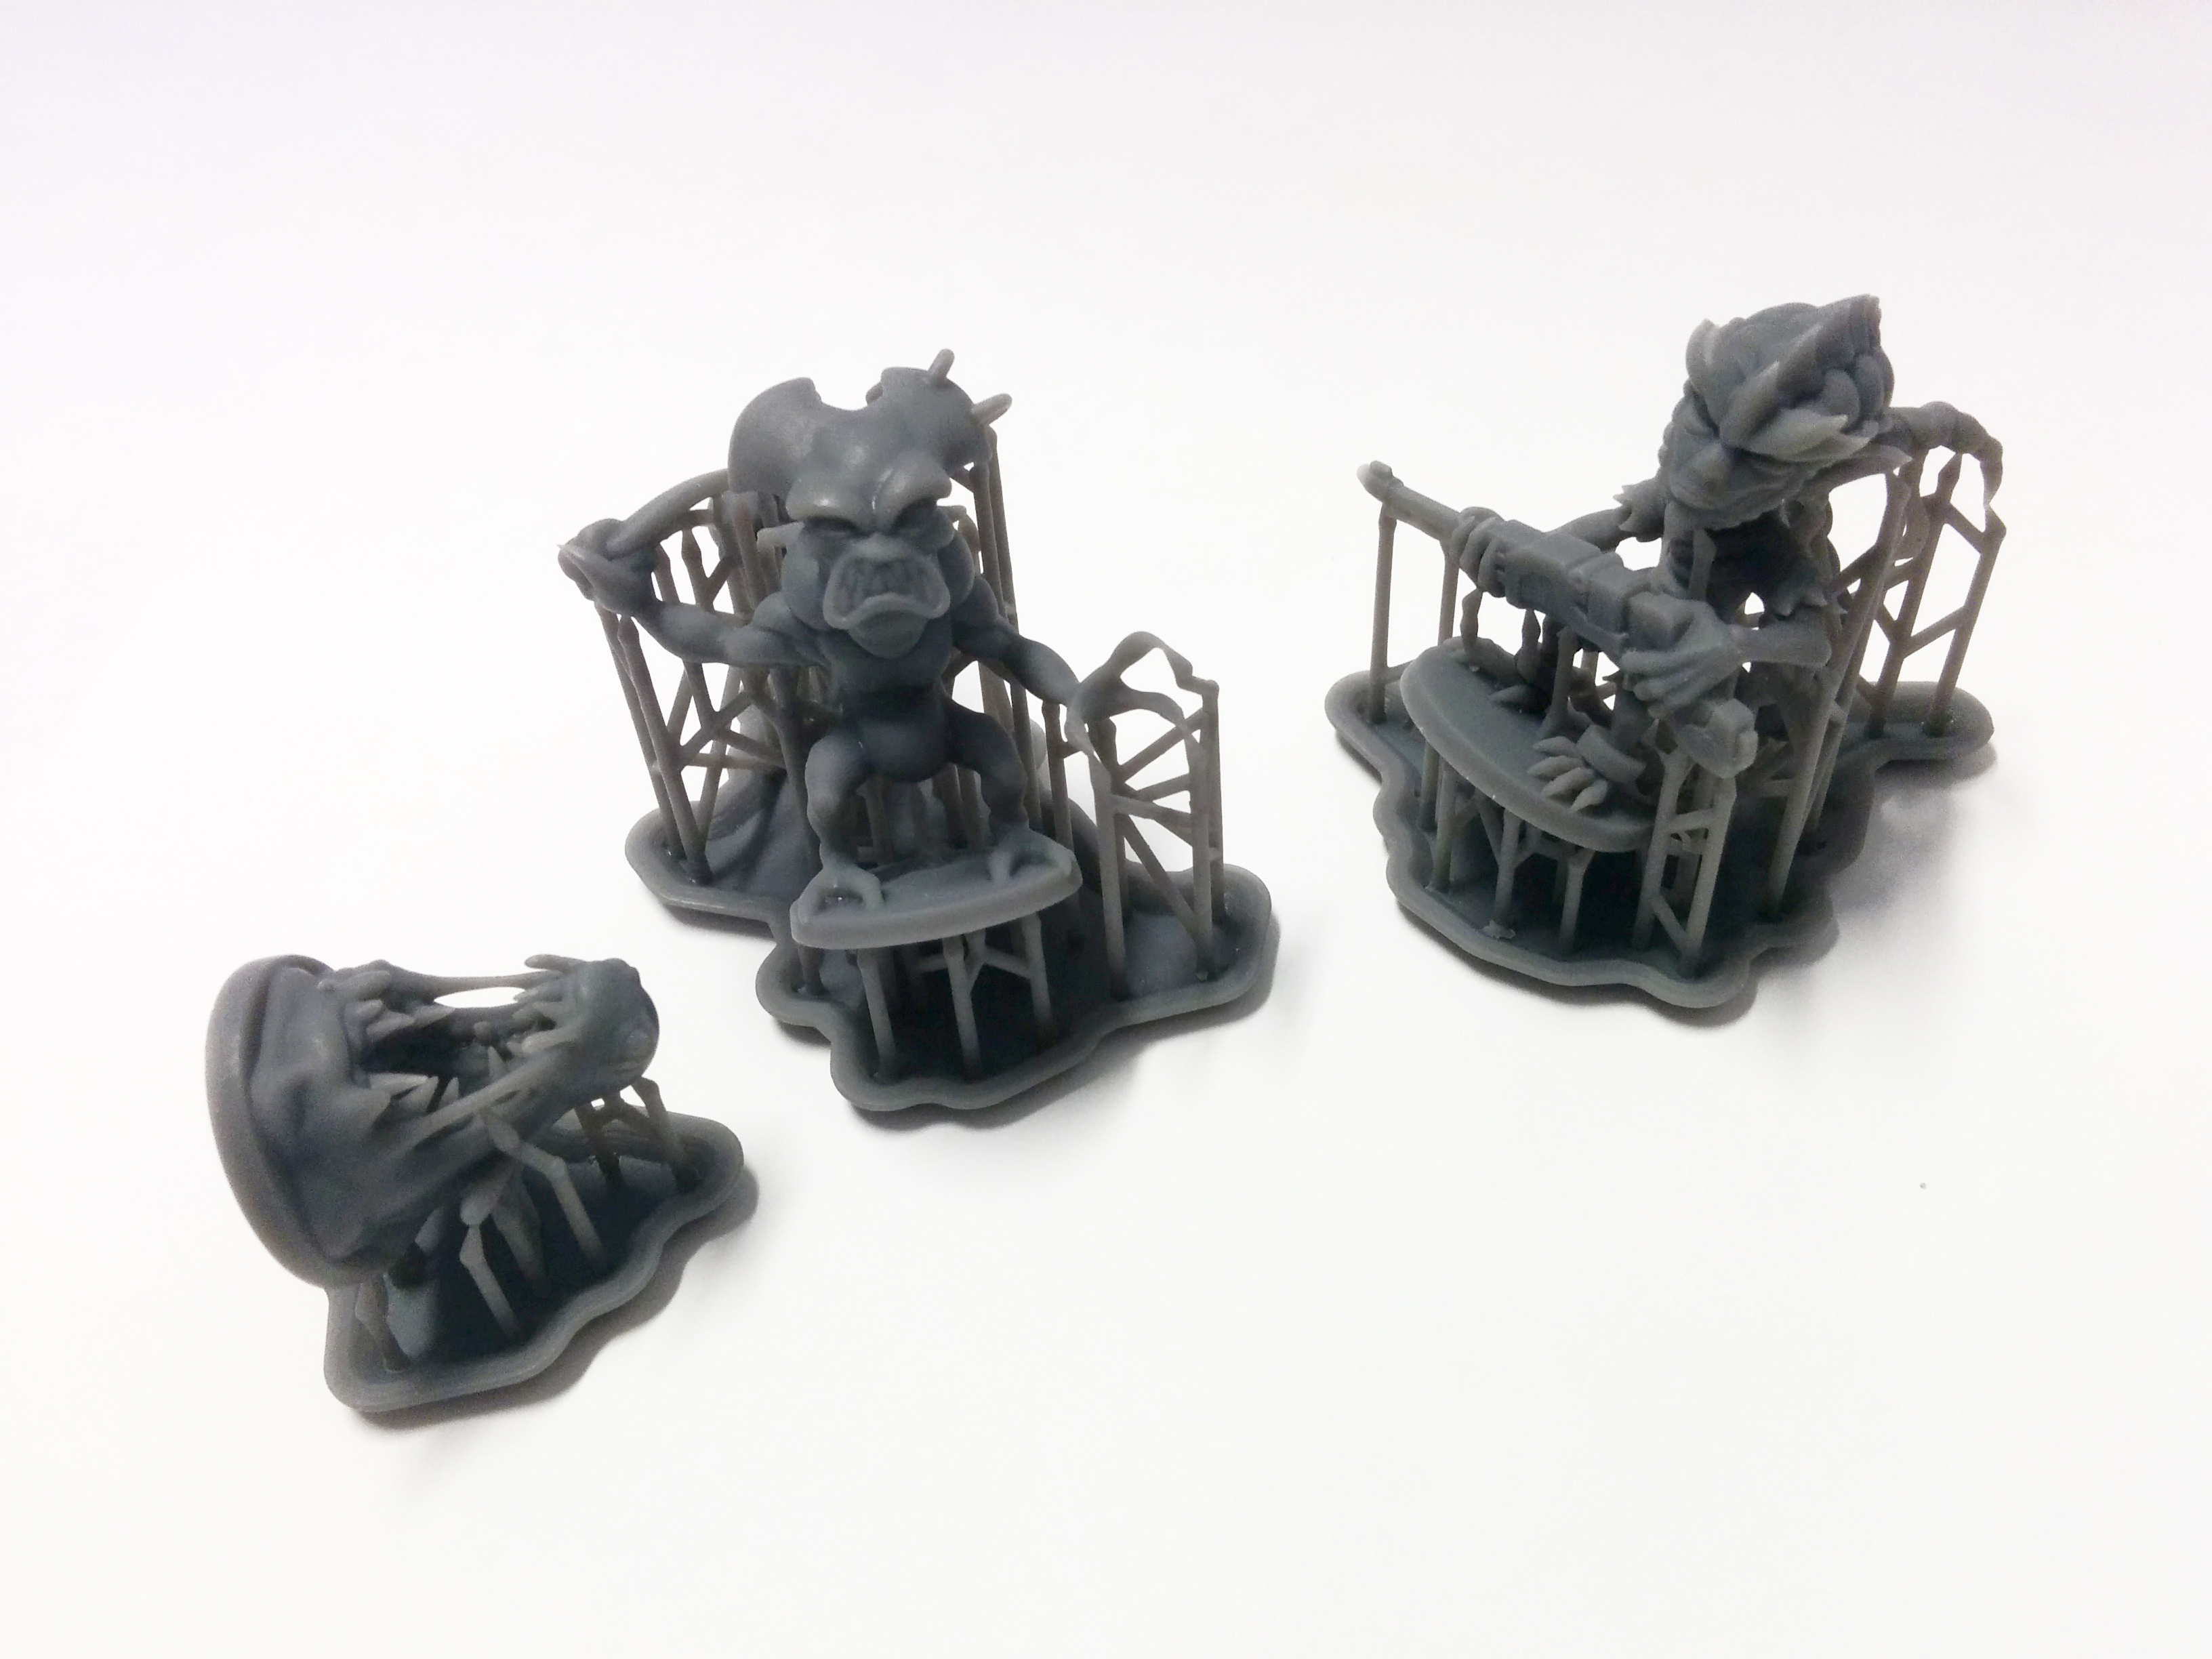
With the Form2, miniatures sometimes need to be oriented and have support struts added to ensure they print intact. The Form2 software PreForm makes this very easy – it will automatically put a lot of supports in place, and its very easy to go in and edit the support structure as necessary to avoid occluding or clogging detail you want.
Once printed, the miniature needs to be removed from its supports. Most supports can simply be gently snapped loose, others can be cut loose with standard modeling cutters, clippers, or knives. If any scratches or divots are left behind, a bit of filing or a dab of mineral oil will flatten these out – if you’re painting your prints, you won’t notice. 3D printing also has the advantage of leaving no mould lines behind!
Just for the sake of this article, we also tested our files out some older filament printers. Here are some photos of the exact same figs when we tried a Micro 3D and the Tinkerine Ditto+. While the Tinkerine Ditto doesn’t capture all of the fine detail quite as perfectly as the Form2, it still produces very decent results, and if you want a lot of simple minis very quickly it’ll do the job just fine.
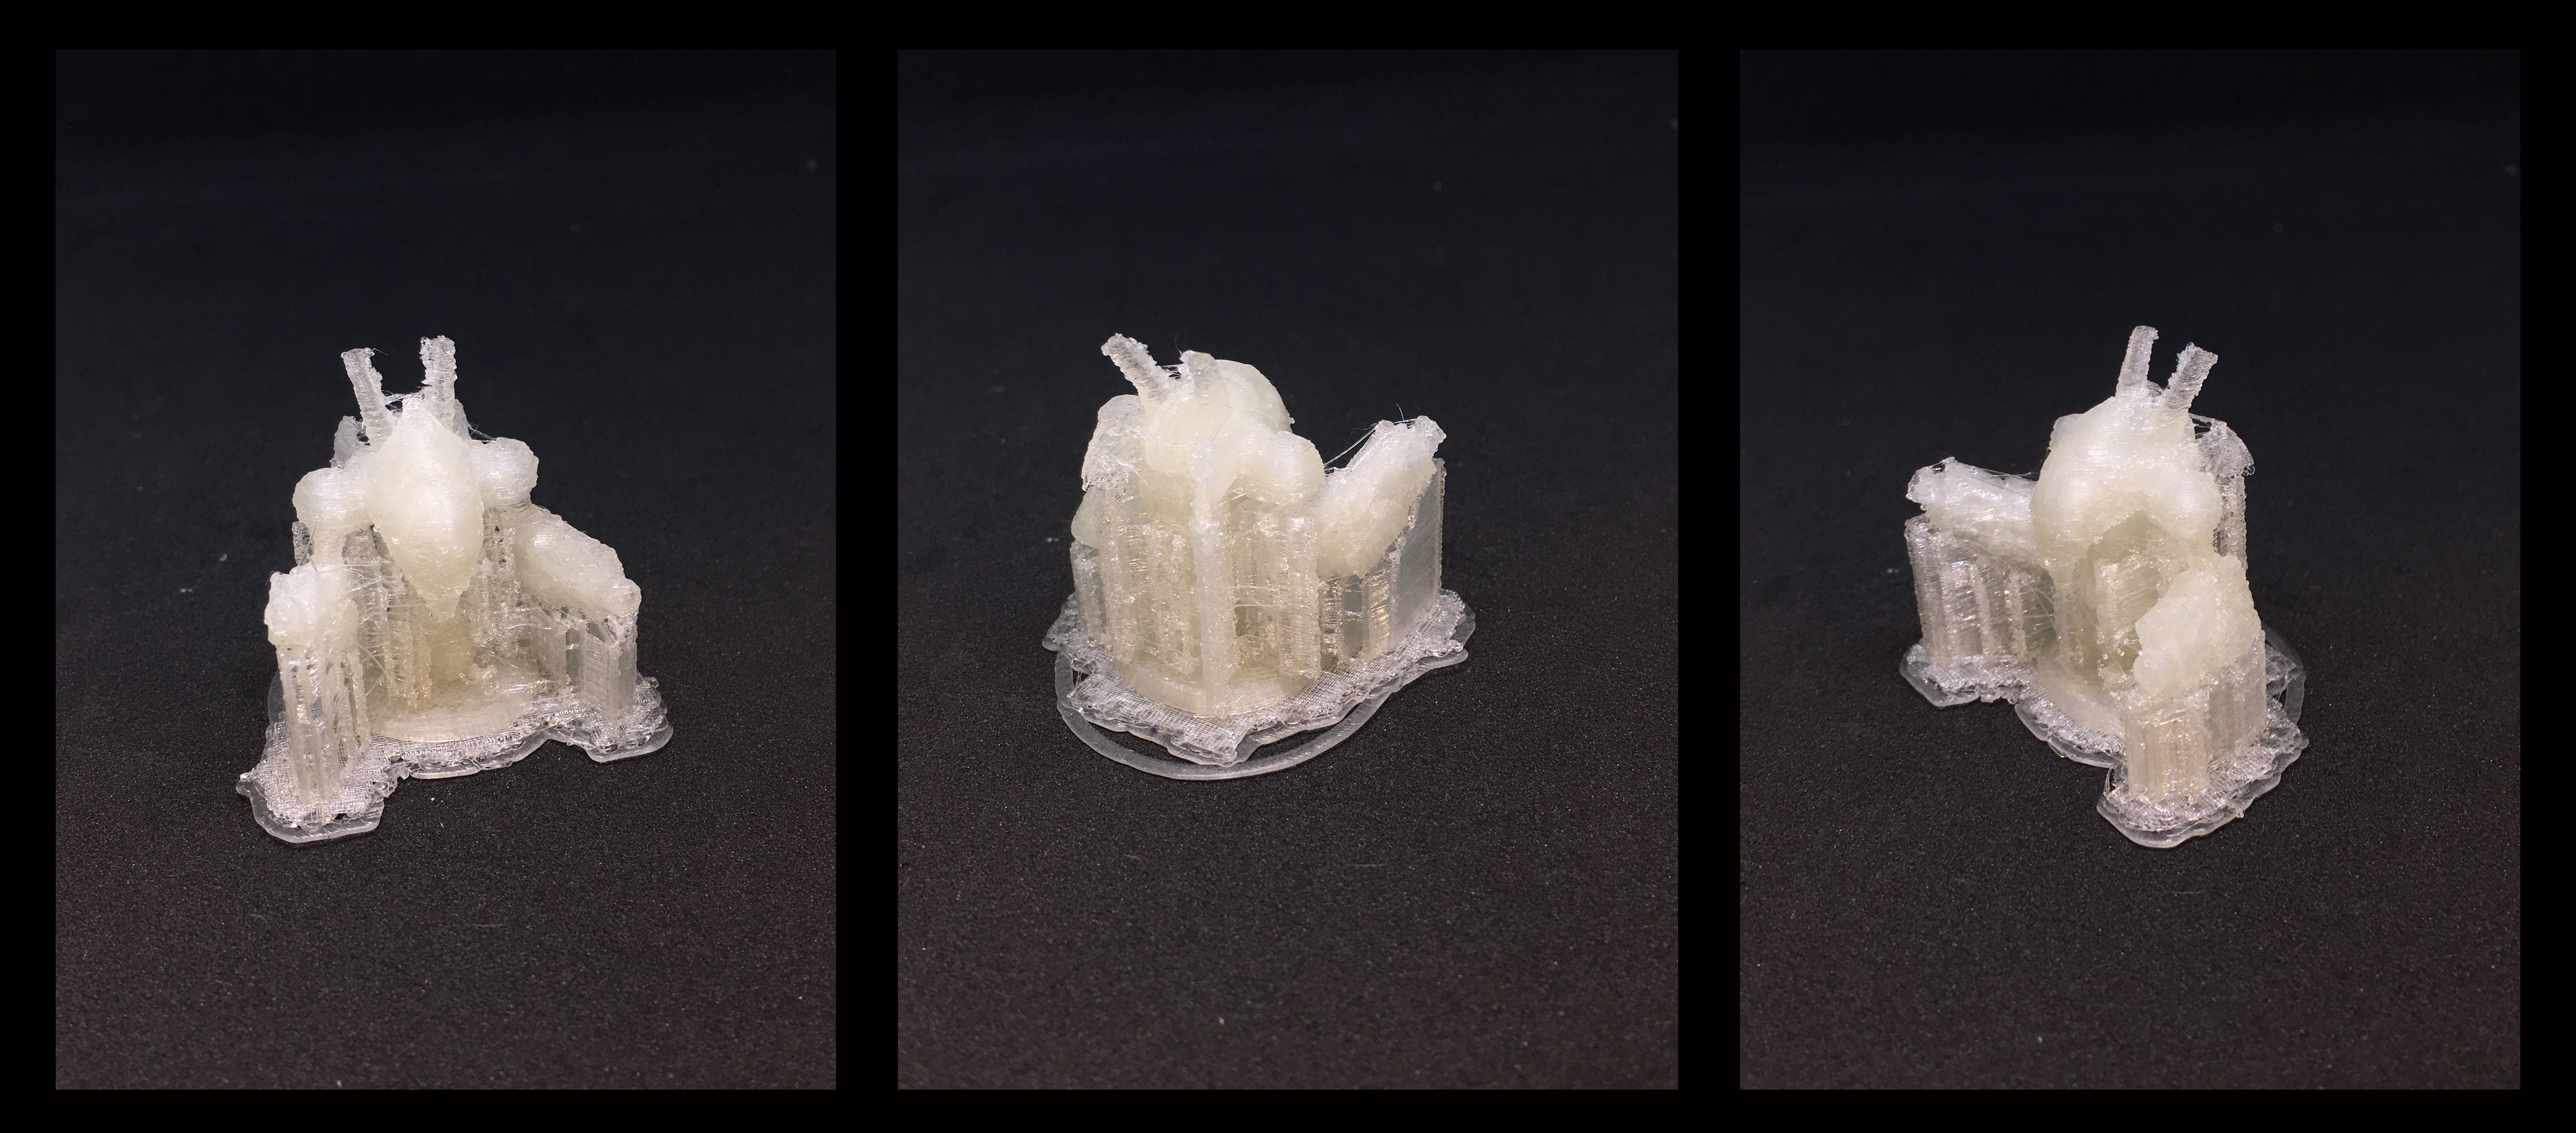
The very oldest printer we could find, the Micro 3D, still produced results that were recognizable, but it took some doing to chisel the finished print free of its cage of support struts!
MEC: From the point of view of tabletop warfare gaming, I would have to say SLA printers have a clear advantage over FDM printed figs in almost all important areas.
The rich smoothness and high detail provided by most SLA printers make it very close to the quality you would be looking at buying the equivalent fig or prop in a gaming store. FDM’s often do nice work, but the technology makes for figs that are inherently trickier to work with, if you’re trying to create finely detailed and painted figures.
I also cannot stress strongly enough how important it is to become adept at placing supports where you want them on a figure, in order get the best results in terms of how the fig looks finished. It may seem a little intimidating at first, but doing it right saves you SO much time and trouble.
How much space do you need to get started with 3D printing? Do you need a well ventilated garage?
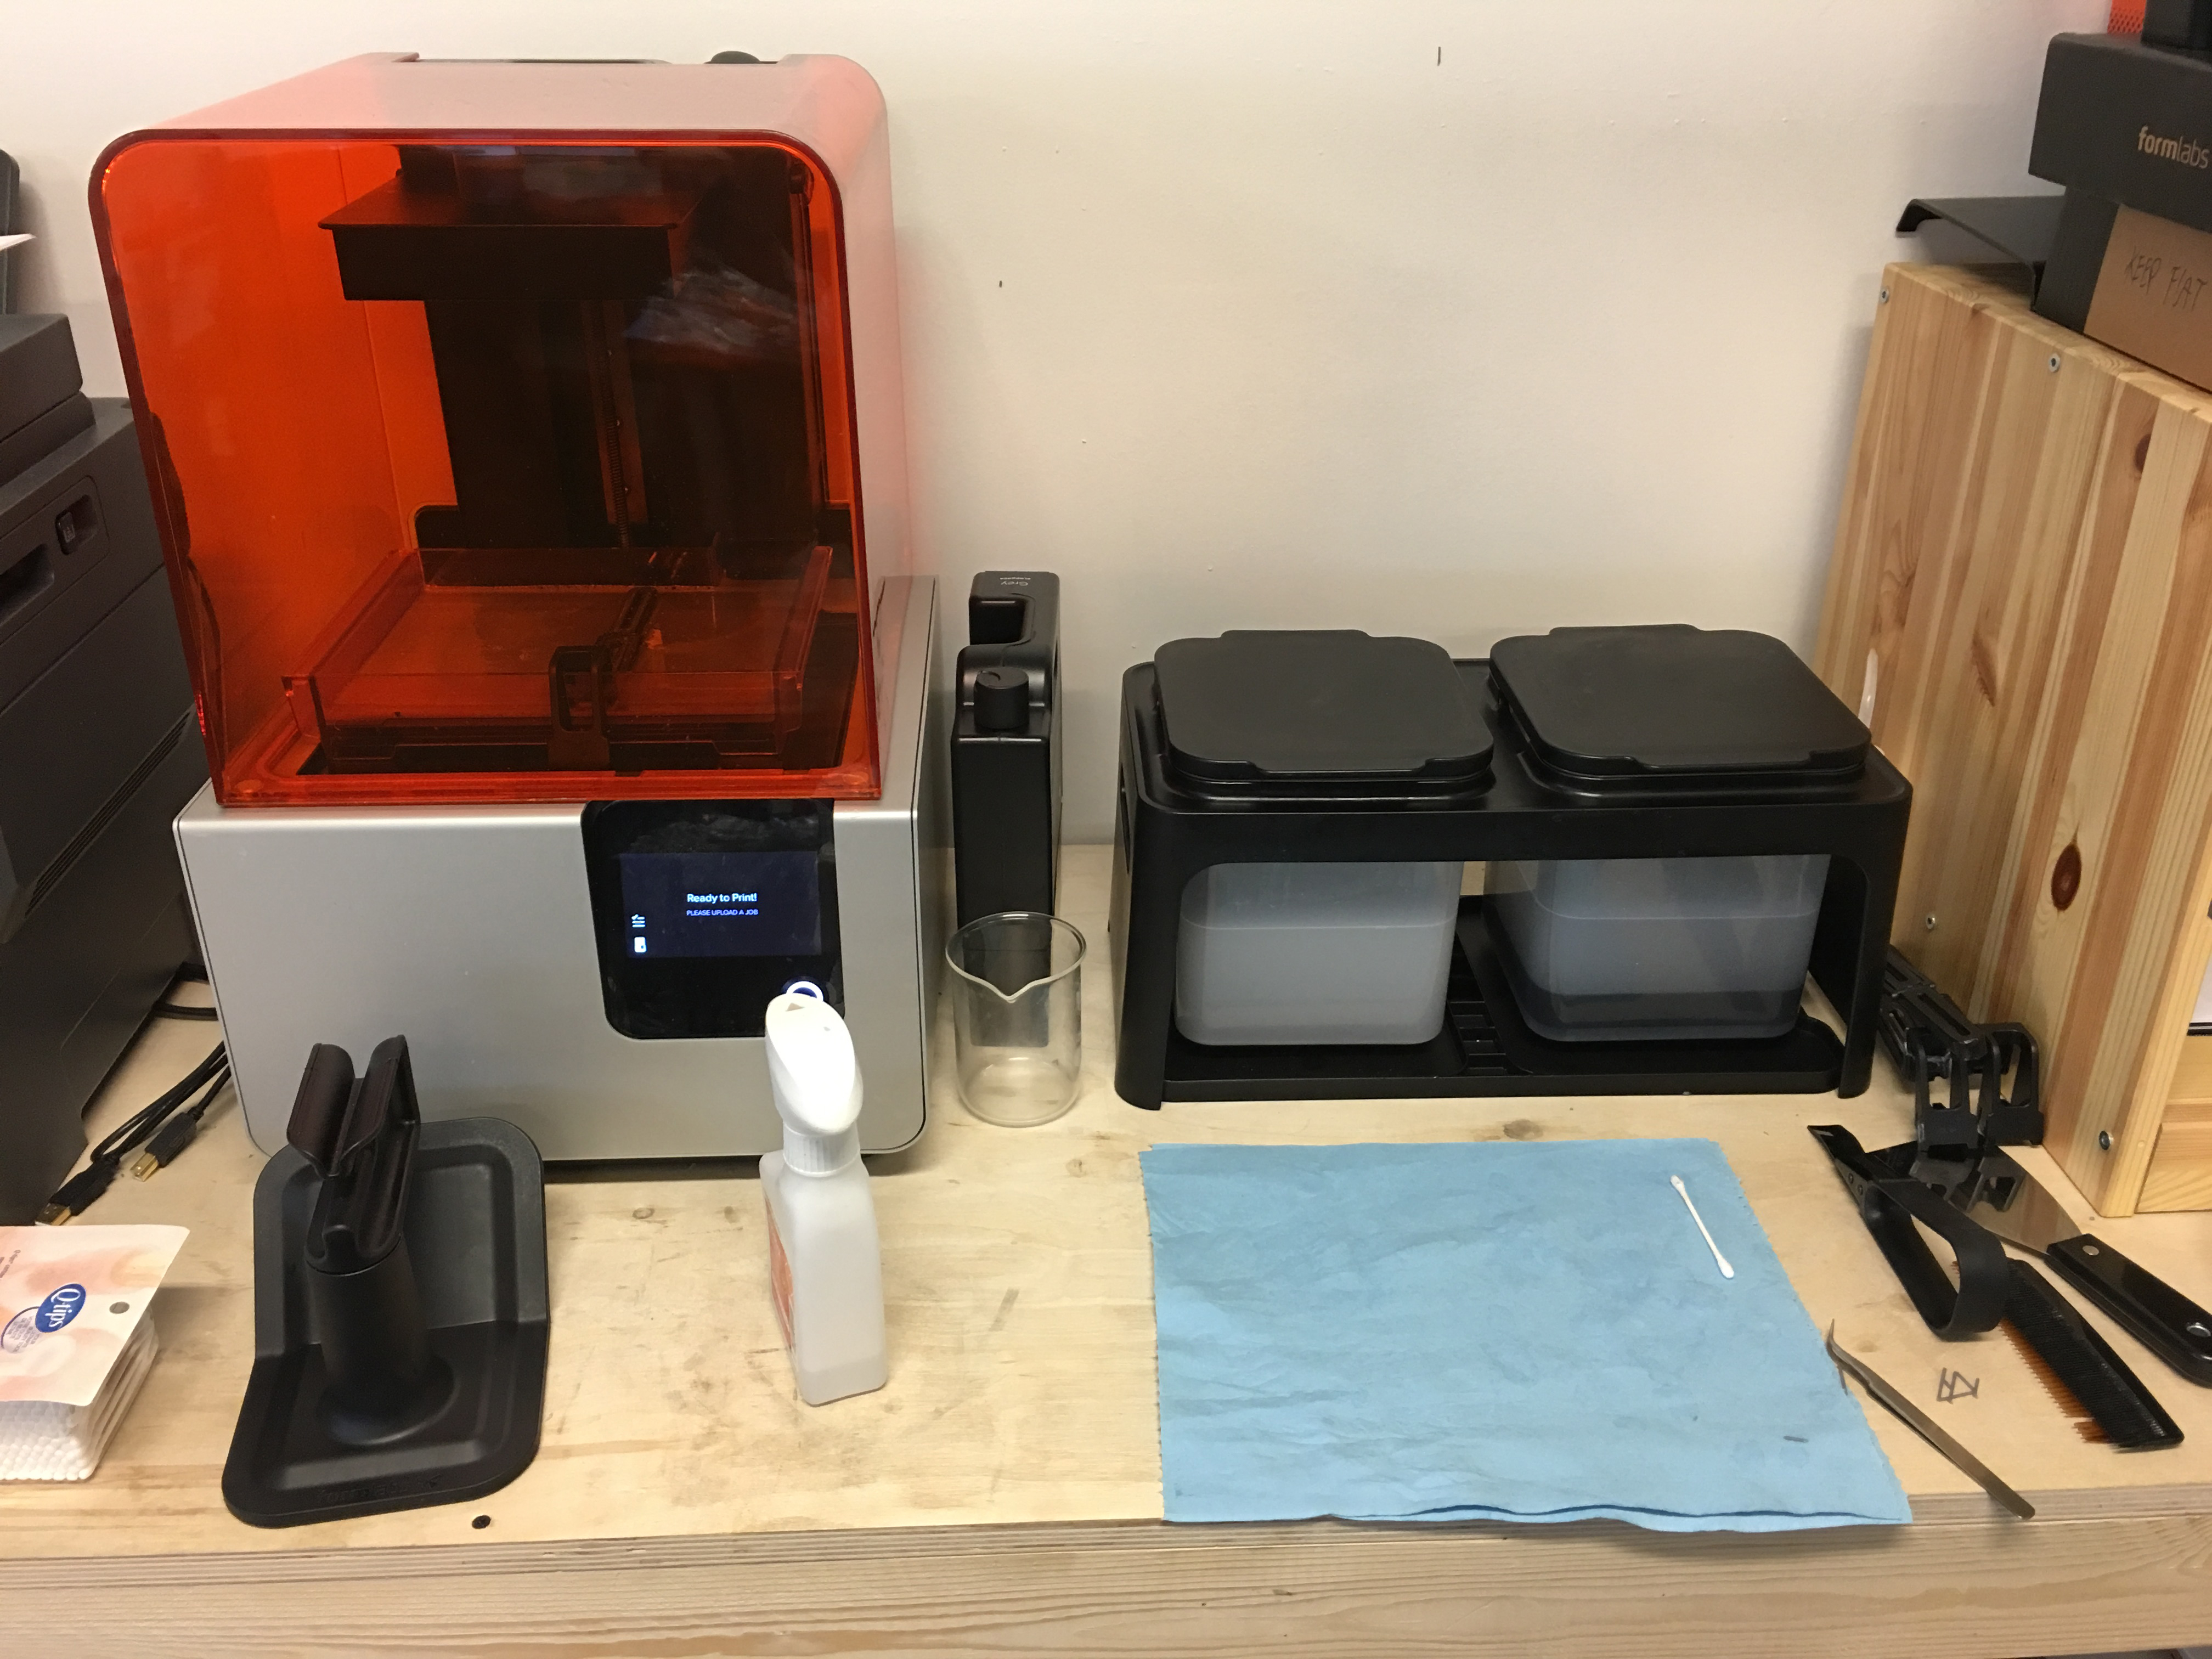
JY: Not at all. The printers we’ve used never take up any more space than most ordinary desktop paper printers. The Form2 we have at the office is set up next to our printer/copier, and it’s actually got a smaller footprint! Any standard desktop or small table is all you’d need to set up and be ready to start.
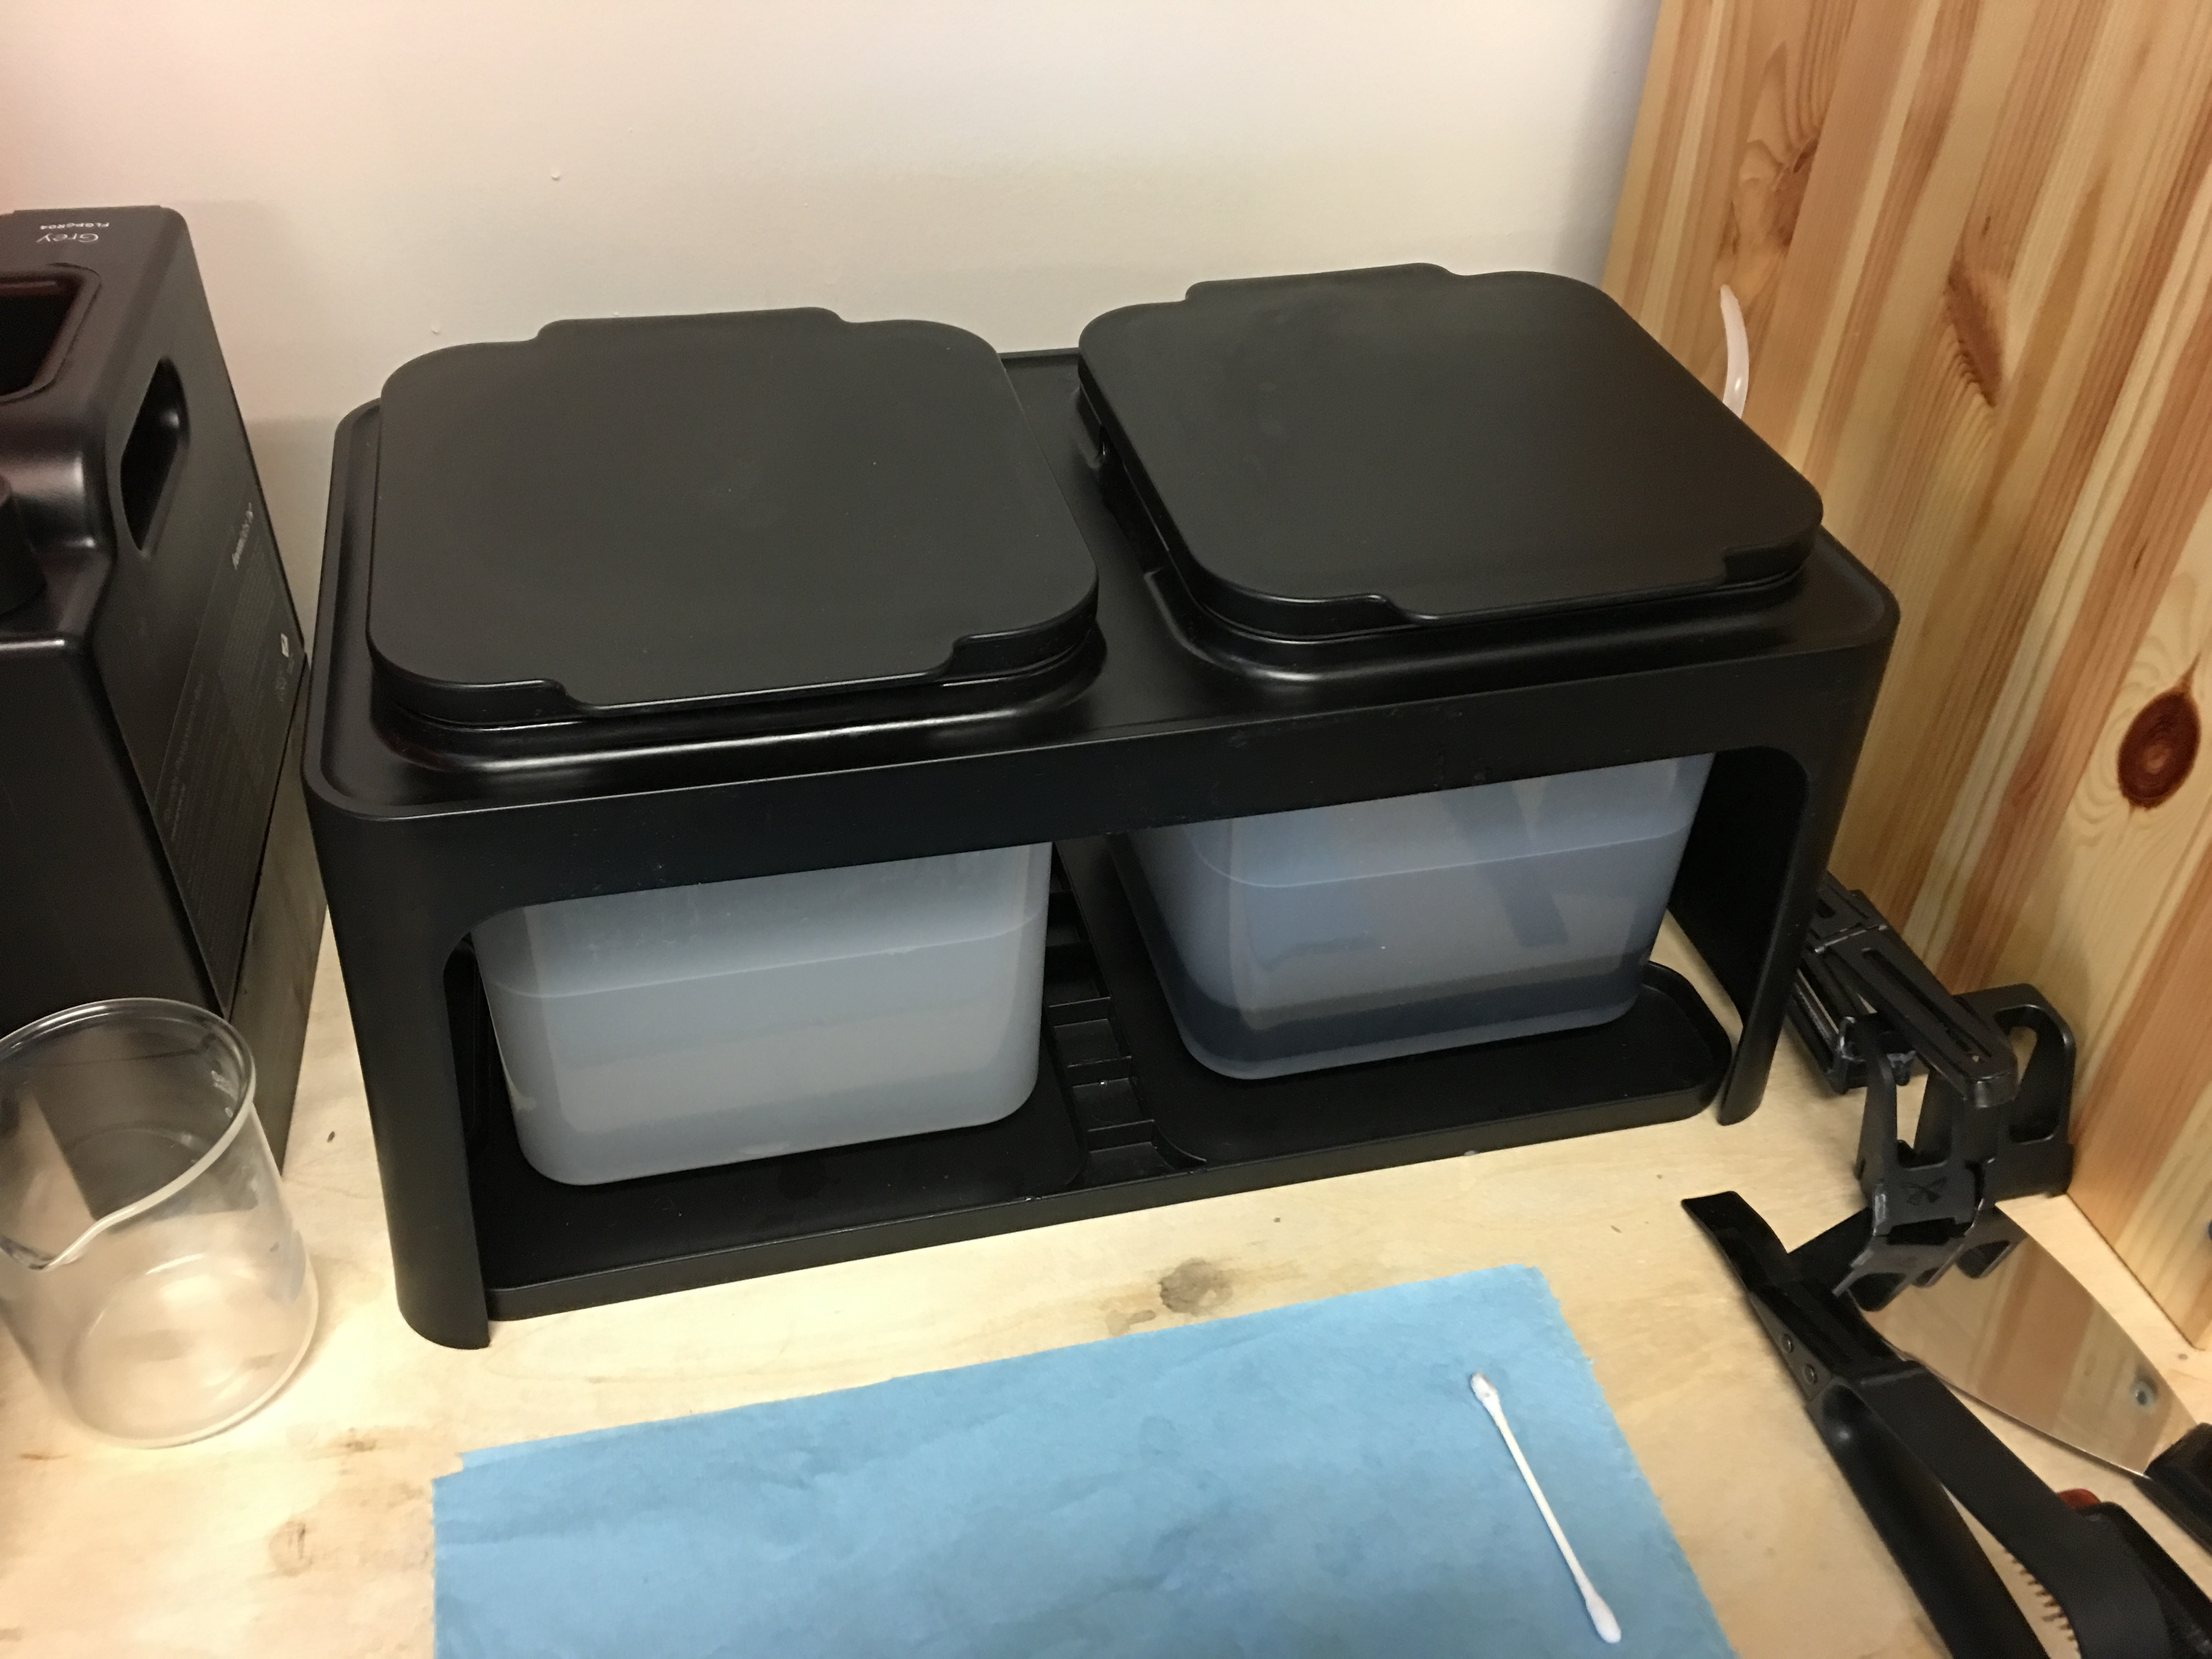
The Form2 uses a liquid resin to print – it does have a distinct smell, but the printer and the resin cartridges are all enclosed, so you won’t notice any smell unless you stick your head in the print chamber and take a deep whiff. Form2 prints are also cured in alcohol for a few minutes, and we keep the basin for the alcohol right next to the printer, but it’s also enclosed. You’ll really only smell it if you’re standing right next to it when it’s opened. If you have the printer in a relatively open room, you’ll never notice any smells at all.
MEC: My desk is less than 10 feet from our print and processing area and it’s no more noticeable to me during a workday than our standard laser printer.
Other than the 3D printer itself, is there anything else that you need before you begin?
JY: When it comes to the Form2, as I mentioned the prints need to be soaked in an alcohol bath for about 20 minutes to remove excess resin from your figures, so you’ll need enough alcohol to immerse your print completely when it’s in the wash.
Other than that, FormLabs provided us with everything we needed, including their software PreForm for connecting a computer to the printer and uploading 3D printable files. Within an hour of unboxing the printer, we’d gotten it all set up, read through the instructions, uploaded a file, and started our first print! (It was a Small Protean from THE PIT, incidentally.)
Are there any resources for tutorials and basic 3D printing questions that you would recommend?
JY: It all depends on which printer you go with. Learning how to get started and produce prints will be a different experience with each different machine. But it’s easier than ever to find resources online that will tell you everything you need to know.
FormLabs has a number of videos and online guides that can walk you through the basics of setting up a file for printing. When we first set up the Form2, their videos were clear and easy to follow, and got us up and running very quickly.
MEC: All3DP is an excellent resource and has a number of great articles for beginners or even people who are just researching 3-D printing in general before jumping in.
What are the three tips you would give to new owners of 3D printers?
JY: Tip One: Don’t be discouraged if a print doesn’t turn out the first time you try printing it! Take a good look at what the results were, and you’ll quickly figure out what went wrong – maybe there weren’t enough supports, or just not enough supports in one small area. Maybe the sculpt needs to be larger or smaller, or just oriented a different way so the printer can produce a more durable print. We had a few prints where a head or an arm popped loose and we decided a neck or a limb needed to be thicker, or a weapon needed to be joined more firmly to the model’s hand.
Tip Two: Don’t be intimidated by the set-up process! When it comes to setting up a sculpt for printing, we used the program PreForm. It comes with functions that will automatically orient your sculpt and apply support struts to it, and the program allows you to edit those supports as well. It’s worth it to learn all of PreForm’s functions, and learn how best to apply supports yourself.
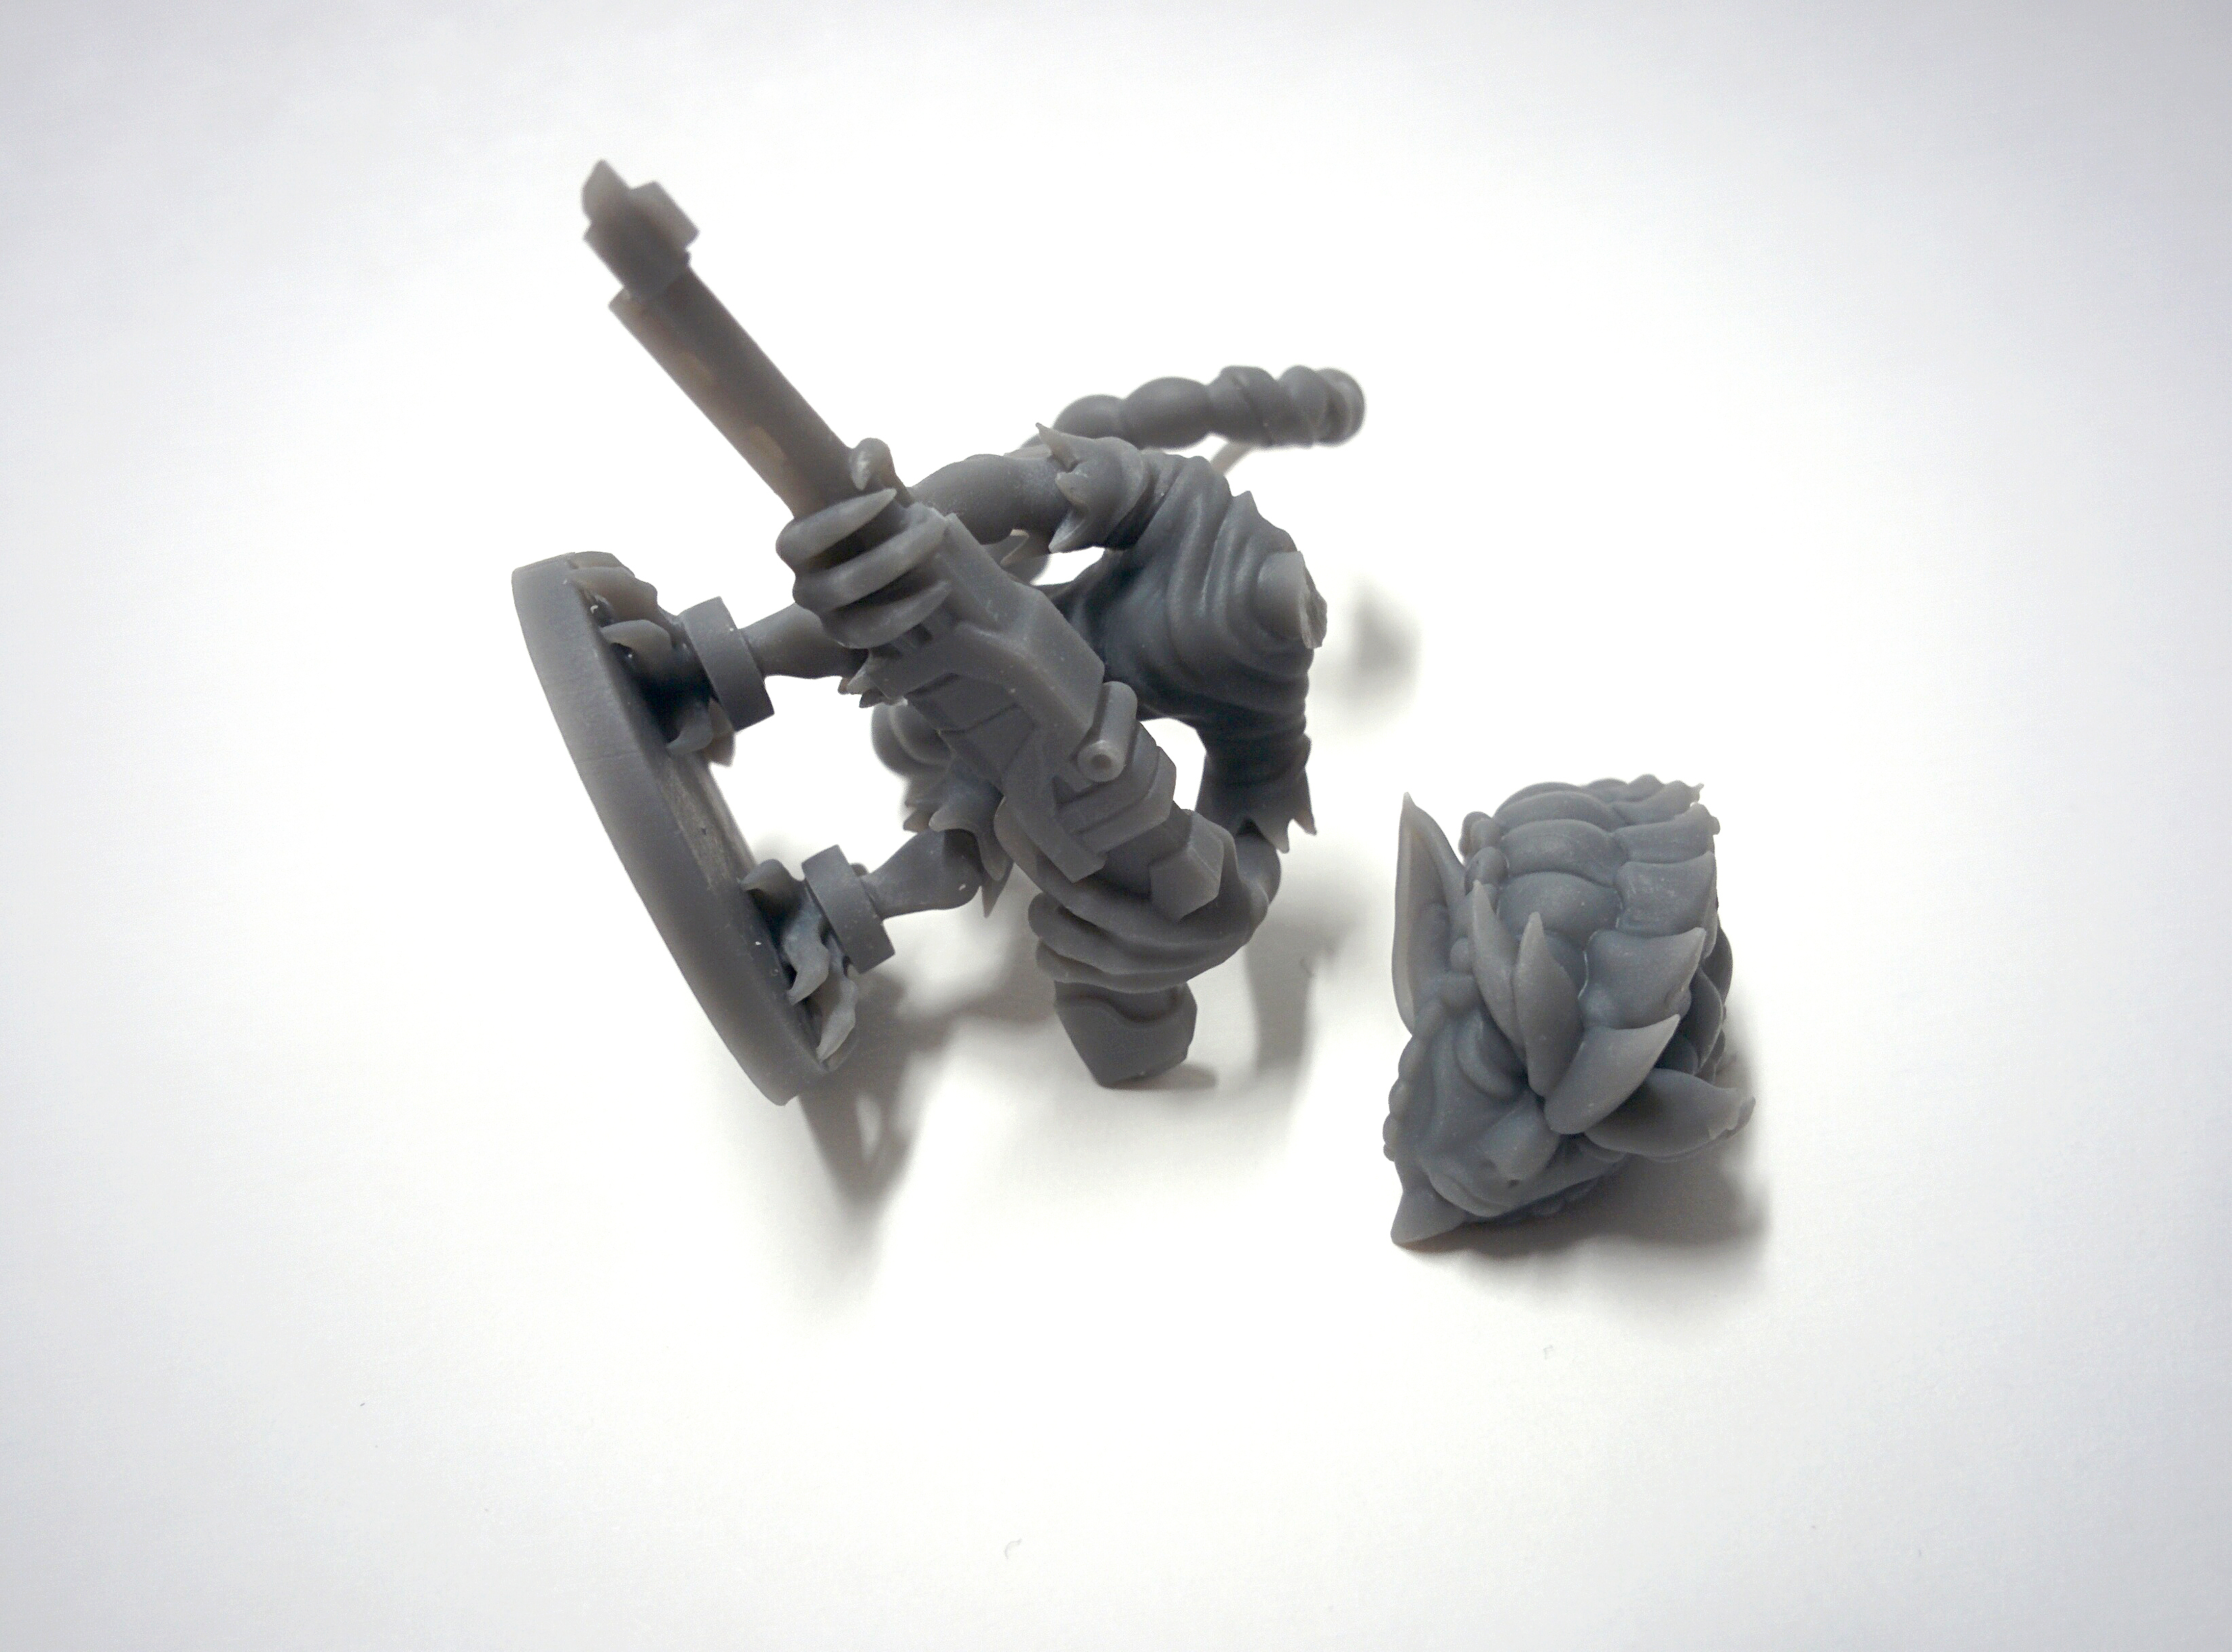
It’s easy, honestly. And you can rapidly learn ways of using fewer and fewer supports on your print, to get the best results. Using the minimum supports necessary not only preserves detail on your print but makes freeing a model from the supports a lot quicker. And it saves you on resin too, since each support you can do without means more resin for printing more minis!
Tip Three: Don’t be shy about sharing failures as well as successes. If you get results you’re unhappy with, share it with the community. Talk to other people who’ve used the same printer as you. Usually someone will be happy to share their thoughts with you.
When a couple of our prints turned out with muted, softer details than what we’d come to expect, we went looking online for a solution. That’s how we found out that the problem was with the resin tray we’d been using since we got the printer.
Resin trays in the Form2 become cloudy after extensive use, resulting in loss of fine detail – once we’d gotten the tank replaced, our prints were back up to top quality! Upshot is, every problem has a solution, and someone else probably already knows what it is, so—don’t be afraid to ask.
How do you go about turning your 3D File into a 3D object?
JY: Once you have the 3D file sculpted, it must be exported into whatever format your 3D printer will accept – all our sculpts were exported in STL format, the most frequently used file format for 3D printing.
FormLabs’ printing software, PreForm, lets you upload STL files and prepare them for printing, with functions that automatically orient and apply support struts to your sculpt. Once you have your sculpt ready and uploaded, starting the Form2 just involves pushing a few buttons.
If you have an especially large sculpt, it can be useful to modify your file with the program MeshMixer before getting it printed. MeshMixer has functions to cut apart and hollow out designs while preserving your sculpt’s details, letting you print larger files in sections or with empty spaces that save you on both resin and weight.
Speaking of 3D Files…What 3D modeling software do you recommend?
JY: All of the digital sculpts we created were done in Zbrush, one of the top-line digital art programs. ZBrush is very good both for creating high-detailed 3D sculpts, and preparing them for export and print. ZBrush has a built-in 3D printing exporter that makes converting sculpts into STL files a snap! But many other programs will have something similar, they’re just not as familiar to me.
Pixologic, the company behind ZBrush, also created the program Sculptris, a free digital sculpting tool with many of the same basic features as ZBrush. It’s ideal for users new to digital sculpting to get started without any upfront costs.
While Sculptris is more limited than ZBrush, ZBrush is also capable of a huge variety of digital art functions beyond purely sculpting. If you’re just starting out in digital sculpting and want to learn, Sculptris is a great option.

So you’ve printed your 3-D model, now what?
MEC: Well, after the science fiction glory of holding something you have created with your own Replicator in the palm of your hand begins to fade…? The next step is figuring out how to make your 3D printed gaming fig look as good as possible by the time it’s on the table.
This part of things can sometimes feel daunting too. Just going in with your usual painting method will often not yield the best results. Thinking ahead will serve you very well, and doing research via Youtube videos can be very helpful—it has certainly worked for me.
As mentioned earlier, FDM printed figs can be a bit trickier to work with. The lower-end technology creates a distinctive rough “tree ring” surface to cope with, and many FDM materials do not take well to sanding. In these cases, I find priming with a slightly thicker than usual brand of primer is very helpful. For broad areas without much detail, I find a couple coats of Mr Surfacer 500 makes for a surface that takes well to smooth sanding. And for more detailed areas, light coats of the 1200 level of Mr Surfacer can make all the difference.
Once again, getting the hang of how and where to place supports on your models in the pre-production phase will make a ton of difference here. You’re going to have to clip those supports and file them down, so…it pays to think ahead!
Try to rotate your model during the pre-printing phase so that most of the supports are attached along broad areas with less detail. This will leave you free to sand the bumps away without losing the details you want to see.
Also, do not be afraid to experiment during this process. The honest truth is that some of your tries will fail and result in parts of the fig falling off during printing, and ruining your print run. C’est la 3D Vie. Just make a note for yourself regarding what supports are too thin or too few and try again.
A printer’s notebook is useful here, so that when you come back to make the same fig again, you remember the process that brought you a fig that is worth the hours of painting and that you can be proud to send into battle on the tabletop.
Any last words for our readers?
Arinn Dembo: We wanted to thank you all for checking out our 3D printing guide and our Kickstarter campaign. If you’re already part of the 3D printing community and would like to test-run one of our minis on your home printer, we’ve uploaded a free mini for you on Thingiverse! You can find it here, on our sharing account.
